Hibiscus Spring Cake
Highlighted under: Dessert Recipe Collection
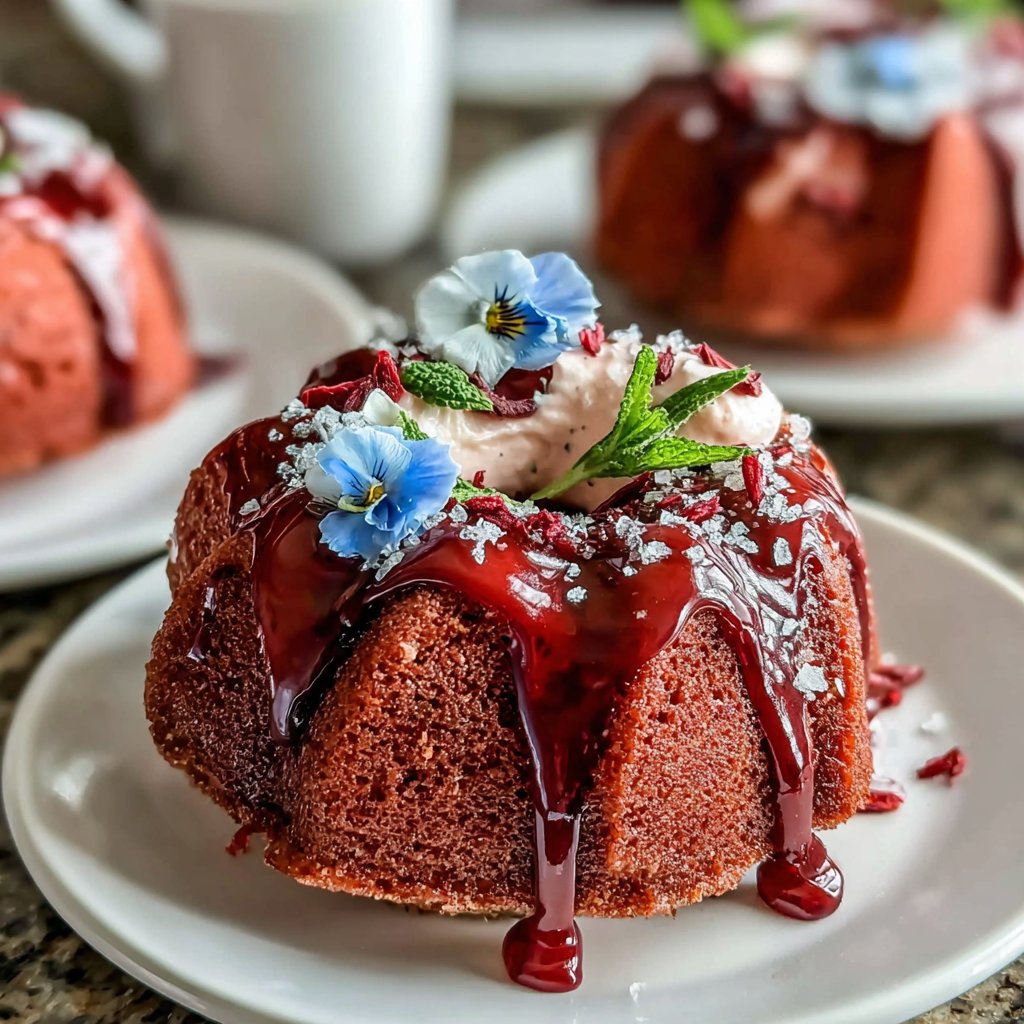
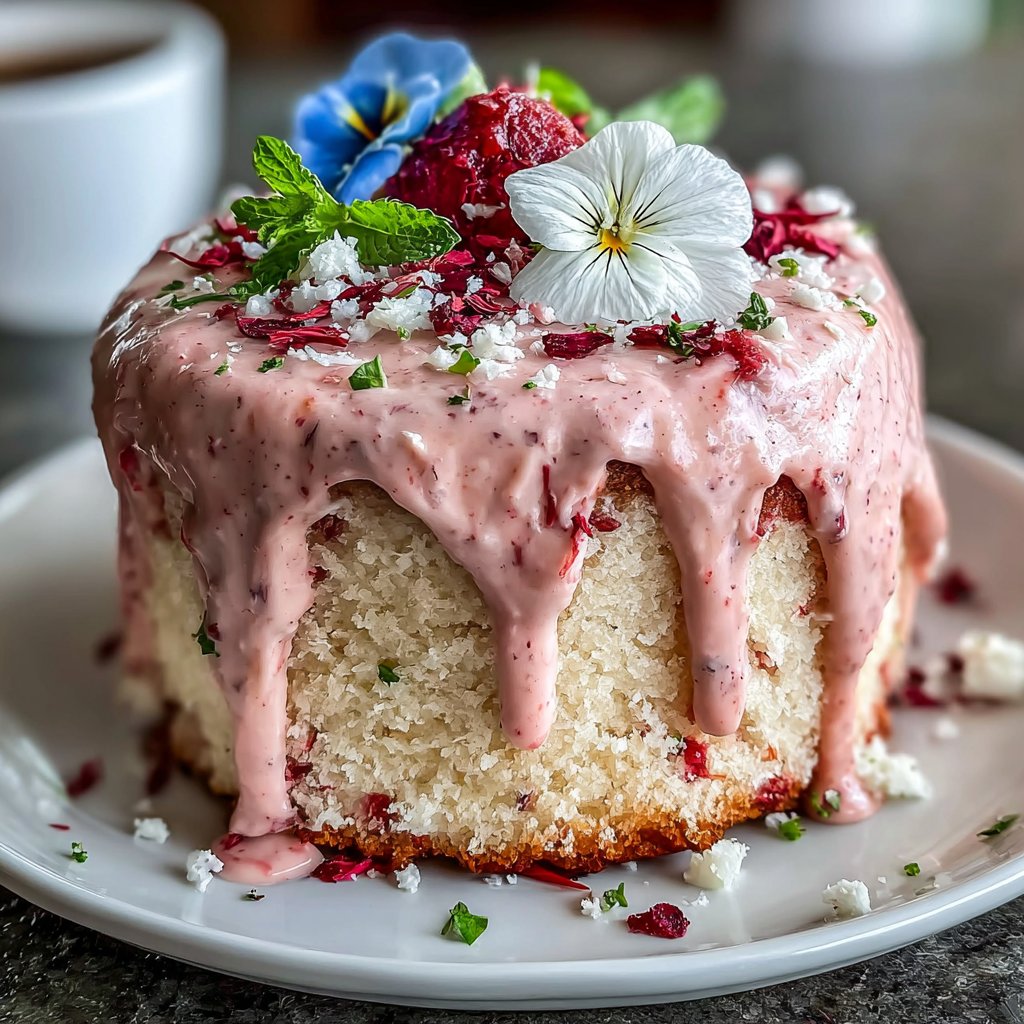
I love making this Hibiscus Spring Cake during the vibrant days of spring. The delicate floral notes paired with a soft, moist texture create a dessert that feels refreshing and indulgent at once. The bright pink hue adds a beautiful pop to the dessert table, making it perfect for springtime gatherings or simply enjoying the season. The natural hibiscus flavor is complemented by a hint of citrus, elevating every bite into something truly special. It’s a recipe that captures the essence of springtime freshness and sunshine.
When I first baked this Hibiscus Spring Cake, I was amazed at how the simple ingredients came together to create something so vibrant and delicious. The balance of flavors is a reminder of blooming flowers and fresh starts that spring brings. Using dried hibiscus flowers is a key tip; they release a unique tartness that perfectly matches the sweetness of the cake.
I've also experimented with different frostings, and I find a light cream cheese frosting really helps to enhance the floral notes without overpowering them. Each slice is a celebration of the season, and it's been a hit with friends and family alike!
Why You Will Love This Recipe
- Unique floral flavor that brightens your day
- Light and fluffy texture that melts in your mouth
- Beautifully vibrant for spring celebrations
Understanding Hibiscus in Baking
Hibiscus flowers are not just beautiful; they bring a unique tartness and depth of flavor to your baked goods, which is essential in this Hibiscus Spring Cake. When crushed, these dried flowers release their vibrant essence, enhancing the overall taste profile. Soak the crushed hibiscus in a bit of warm water for about 10 minutes before adding it to your batter; this not only intensifies the flavor but also helps in achieving a moist cake texture.
Additionally, hibiscus contains natural acids that can interact with baking soda or baking powder, potentially altering the rise of the cake. That’s why it's essential to stick to the provided measurements and not substitute baking powder with baking soda in this recipe. Tracking how long you bake your cakes is crucial too: overbaking can lead to dryness and detract from the soft, moist texture we aim for.
Perfecting Your Cream Cheese Frosting
The cream cheese frosting is key to making your Hibiscus Spring Cake truly special. Ensuring that both the cream cheese and butter are at room temperature is crucial; this allows for a smoother blend without lumps. If you accidentally overbeat the frosting, it could become too soft. To save it, refrigerate the frosting for about 15 minutes, then rewhip it to restore its consistency.
Adjusting the frosting to your desired sweetness and thickness is simple. If you find it too sweet for your liking, you can add a pinch of salt to balance the flavors. Alternatively, if you prefer a more citrusy flavor, consider adding a bit of lemon juice or zest to the frosting for an extra springtime lift.
Presentation and Serving Suggestions
Presentation can elevate your Hibiscus Spring Cake from delicious to spectacular. For a visual treat, garnish your frosted cake with delicate edible flowers or additional dried hibiscus petals. A sprinkle of lemon zest on top adds a lovely pop of color while emphasizing the citrus notes present in the cake. Serving the cake chilled enhances the refreshing qualities of the hibiscus, making it an ideal dessert for warm spring days.
If you're looking to make this cake ahead of time, it stores well in an airtight container in the refrigerator for up to 3 days, but the frosting is best applied just before serving to maintain its freshness. Cut slices and serve them on fancy plates to impress your guests, or serve them alongside a cup of herbal tea to complement the floral notes.
Ingredients
Gather these fresh ingredients to make your Hibiscus Spring Cake. Ensure all are at room temperature for the best results!
Cake Ingredients
- 2 cups all-purpose flour
- 1 ½ cups granulated sugar
- ½ cup unsalted butter, softened
- 1 cup milk
- 2 large eggs
- 1 tablespoon baking powder
- 1 teaspoon vanilla extract
- ½ cup dried hibiscus flowers, crushed
- Juice and zest of 1 lemon
- Pinch of salt
Cream Cheese Frosting Ingredients
- 8 oz cream cheese, softened
- ½ cup unsalted butter, softened
- 4 cups powdered sugar
- 1 teaspoon vanilla extract
- 1-2 tablespoons milk, as needed
Once you've prepared your ingredients, you're ready to start baking!
Instructions
Follow these steps for a delightful Hibiscus Spring Cake that will impress anyone who takes a bite.
Prepare the Oven
Preheat your oven to 350°F (175°C) and grease two 9-inch round cake pans.
Combine Dry Ingredients
In a bowl, whisk together the flour, baking powder, salt, and crushed hibiscus flowers. Set aside.
Mix Wet Ingredients
In a large mixing bowl, cream together the butter and sugar until light and fluffy. Add eggs one at a time, mixing well after each addition. Stir in the vanilla, lemon juice, and zest.
Combine Mixtures
Gradually add the dry ingredients to the wet mixture, alternating with milk, mixing just until combined.
Bake the Cakes
Divide the batter evenly between the prepared cake pans and bake for 30 minutes or until a toothpick inserted in the center comes out clean.
Cool the Cakes
Allow the cakes to cool in the pans for 10 minutes before transferring them to wire racks to cool completely.
Prepare the Frosting
In a bowl, beat together the softened cream cheese and butter. Gradually add powdered sugar and vanilla, mixing until smooth. Adjust consistency with milk as needed.
Assemble the Cake
Place one cake layer on a serving plate. Spread a layer of frosting on top. Add the second layer and frost the top and sides of the cake.
Serve and Enjoy
Slice the cake and serve it with a smile! Enjoy your delicious Hibiscus Spring Cake.
Now that you’ve baked your beautiful cake, don’t forget to share it with loved ones!
Pro Tips
- For added flavor, try infusing some hibiscus tea in the milk before using it in the recipe.
Troubleshooting Common Issues
One common issue when baking cakes is ensuring they rise evenly. If you notice that one layer is higher than the other, this can often be attributed to uneven oven heat. To combat this, I recommend rotating the cake pans halfway through the baking time. This simple step helps to distribute the heat more evenly and results in perfectly even layers.
Another issue could be cakes sticking to the pan. To prevent this, ensure that you grease the pans thoroughly and flour them after greasing, or use parchment paper to line the bottoms. If your cake does stick despite these measures, run a thin knife around the edges to loosen it before inverting it onto a cooling rack.
Flavor Variations to Try
While this recipe is delightful as is, experimenting with additional flavors can make it uniquely yours. For instance, adding a teaspoon of almond extract to the batter can provide an interesting nutty contrast to the floral hibiscus. Alternatively, you might consider incorporating a bit of coconut milk instead of regular milk for a tropical twist that complements the hibiscus beautifully.
If you'd like a more vibrant and rich cake, try layering in some berry jam between the cake layers for a tangy surprise. Blueberry or raspberry would harmonize well with the hibiscus and add balance to the flavor. Don’t hesitate to get creative with garnishes as well; a mix of fresh berries atop your cake would not only look beautiful but also add a refreshing element.
Make-Ahead Tips
If you're planning to serve this cake at a gathering, you can make the cakes a day ahead. Once completely cooled, wrap the layers tightly in plastic wrap and store them in the refrigerator. This not only saves you time on the day of the event but also allows the flavors to meld together for a richer taste.
Frost the cake on the day of serving to keep the frosting fresh. If you're looking to save more time, consider making the cream cheese frosting a day ahead as well; just store it in a separate airtight container in the fridge. Before using it, give it a quick stir to restore its creamy texture.
Questions About Recipes
→ Can I use fresh hibiscus instead of dried?
Yes, but you'll need to reduce the quantity and ensure they are well-prepared before use.
→ How should I store the cake?
Store in an airtight container in the fridge for up to 3 days.
→ Can I freeze this cake?
Yes, you can freeze the unfrosted cake layers for up to 3 months.
→ What can I substitute for cream cheese in the frosting?
You can use mascarpone or a non-dairy cream cheese alternative if you prefer.
Hibiscus Spring Cake
Created by: The Quickbitehub Team
Recipe Type: Dessert Recipe Collection
Skill Level: Intermediate
Final Quantity: 8 servings
What You'll Need
Cake Ingredients
- 2 cups all-purpose flour
- 1 ½ cups granulated sugar
- ½ cup unsalted butter, softened
- 1 cup milk
- 2 large eggs
- 1 tablespoon baking powder
- 1 teaspoon vanilla extract
- ½ cup dried hibiscus flowers, crushed
- Juice and zest of 1 lemon
- Pinch of salt
Cream Cheese Frosting Ingredients
- 8 oz cream cheese, softened
- ½ cup unsalted butter, softened
- 4 cups powdered sugar
- 1 teaspoon vanilla extract
- 1-2 tablespoons milk, as needed
How-To Steps
Preheat your oven to 350°F (175°C) and grease two 9-inch round cake pans.
In a bowl, whisk together the flour, baking powder, salt, and crushed hibiscus flowers. Set aside.
In a large mixing bowl, cream together the butter and sugar until light and fluffy. Add eggs one at a time, mixing well after each addition. Stir in the vanilla, lemon juice, and zest.
Gradually add the dry ingredients to the wet mixture, alternating with milk, mixing just until combined.
Divide the batter evenly between the prepared cake pans and bake for 30 minutes or until a toothpick inserted in the center comes out clean.
Allow the cakes to cool in the pans for 10 minutes before transferring them to wire racks to cool completely.
In a bowl, beat together the softened cream cheese and butter. Gradually add powdered sugar and vanilla, mixing until smooth. Adjust consistency with milk as needed.
Place one cake layer on a serving plate. Spread a layer of frosting on top. Add the second layer and frost the top and sides of the cake.
Slice the cake and serve it with a smile! Enjoy your delicious Hibiscus Spring Cake.
Extra Tips
- For added flavor, try infusing some hibiscus tea in the milk before using it in the recipe.
Nutritional Breakdown (Per Serving)
- Calories: 300 kcal
- Total Fat: 16g
- Saturated Fat: 8g
- Cholesterol: 45mg
- Sodium: 180mg
- Total Carbohydrates: 39g
- Dietary Fiber: 1g
- Sugars: 28g
- Protein: 3g