Shamrock Sugar Cookies
Highlighted under: Dessert Recipe Collection
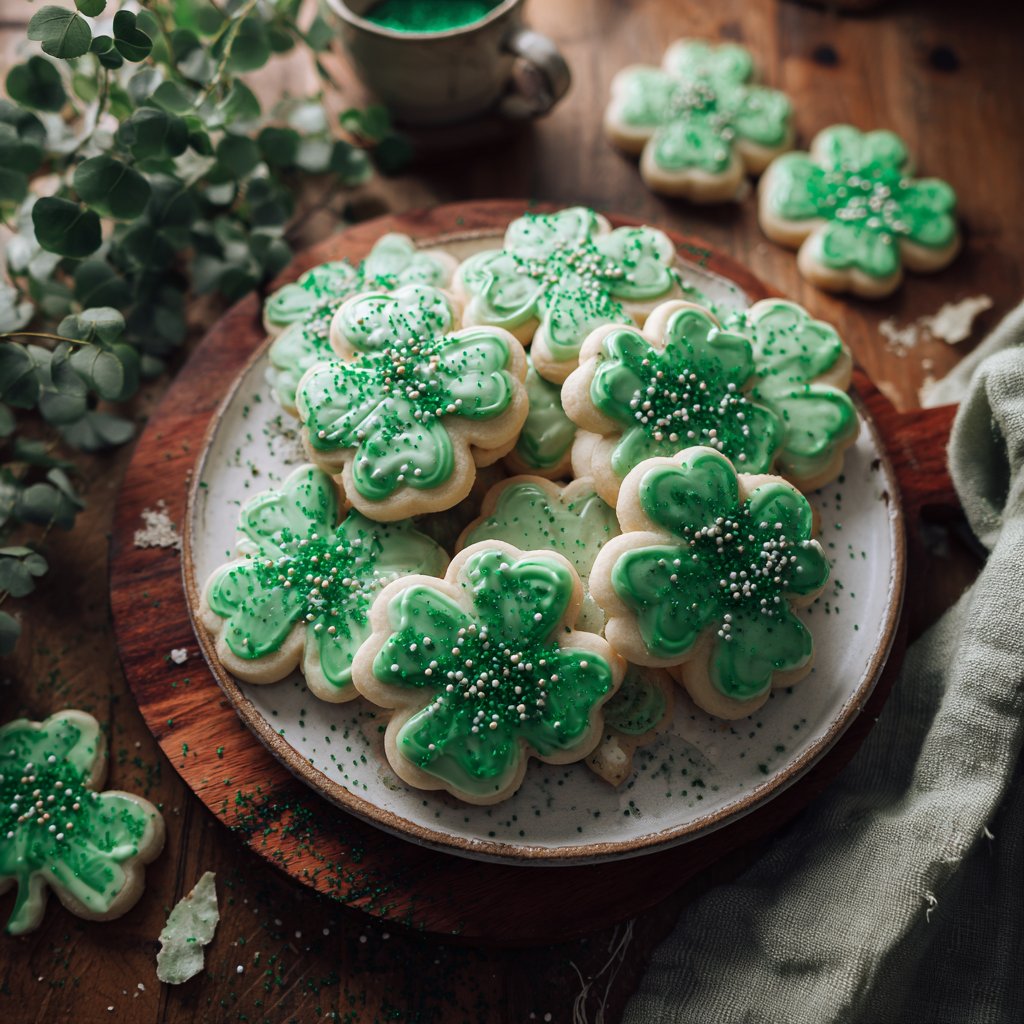
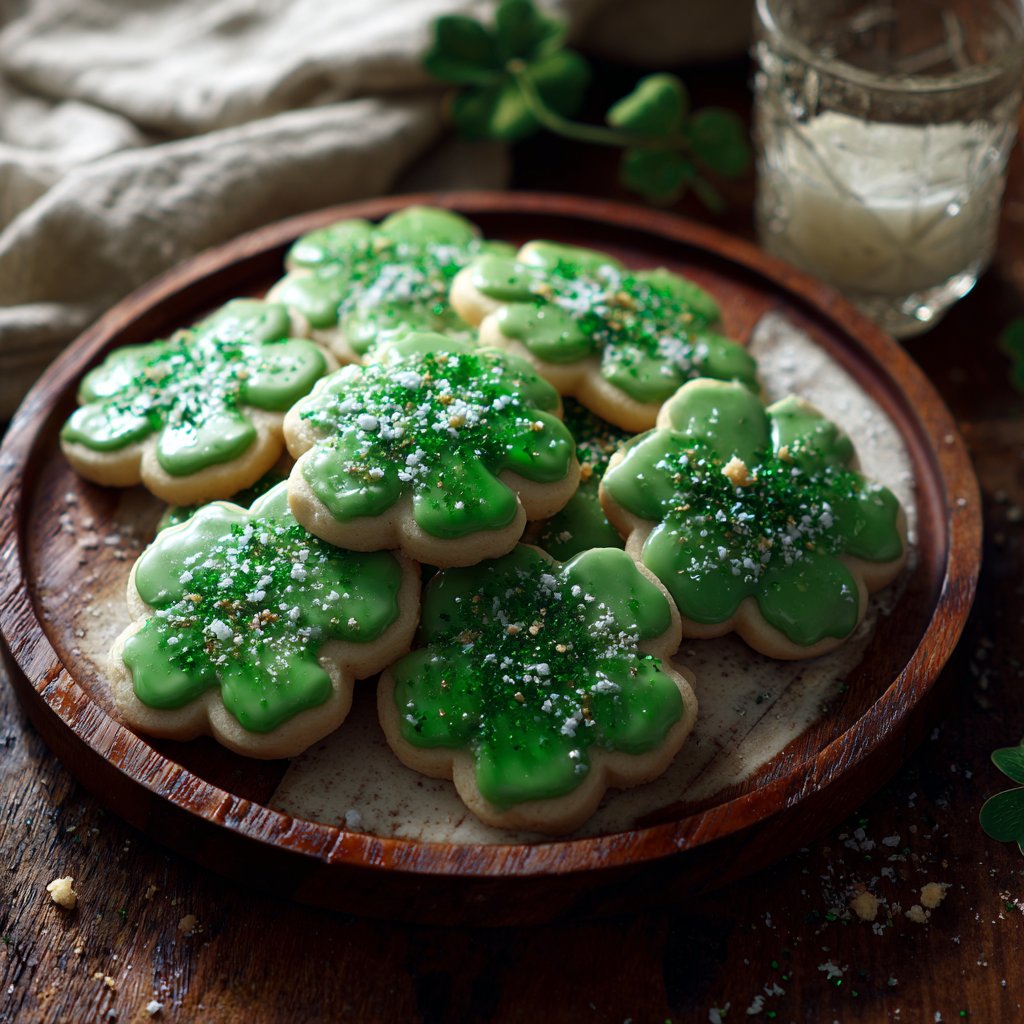
I truly adore making Shamrock Sugar Cookies, especially during the festive season. Each bite is a delightful mix of buttery sweetness and a hint of vanilla, creating a texture that just melts in your mouth. We love to decorate them with vibrant green icing and festive sprinkles, making them a visual treat as well. Personally, I find the process of rolling out the dough and cutting out the shamrock shapes incredibly enjoyable. These cookies not only taste amazing, but they also bring a cheerfulness to our celebrations, making them perfect for sharing with friends and family.
While creating these Shamrock Sugar Cookies, I experimented with different flavorings and discovered that adding a bit of almond extract elevates the overall taste remarkably. It's a subtle addition that many may not think of, yet it brings a lovely depth to the cookies. I also learned that chilling the dough for just 15 minutes helps in achieving cleaner shapes when cutting out the shamrock designs.
These cookies have become a staple in my home, especially during St. Patrick's Day. We love decorating them with royal icing and colorful sprinkles, making them a perfect centerpiece for our celebrations. The joy on my family’s faces when they see these treats is just priceless!
Why You'll Love This Recipe
- Fun and festive design that brightens up any gathering.
- Simple ingredients that are likely already in your pantry.
- Perfect for kids to help with decorating.
- Versatile and can be customized with different flavors.
The Role of Each Ingredient
Every ingredient plays a crucial role in embodying the perfect Shamrock Sugar Cookie. The all-purpose flour provides the structure and stability needed for shaping, while the butter brings richness and moisture, creating that delightful melt-in-your-mouth texture. Sugar is not just for sweetness; it also helps achieve that perfect golden edge when baked, making the cookies visually appealing as well as delicious.
The egg acts as a binder, ensuring the dough holds together and maintains its shape during baking. Vanilla and almond extracts add depth of flavor, enhancing the overall profile of your cookies. Don’t skip the food coloring; it elevates the festive spirit, allowing the cookies to truly radiate the celebration.
Chilling the Dough and Its Importance
Chilling the dough for at least 15 minutes is a pivotal step that should not be overlooked. This allows the butter to firm up, making rolling out the dough much easier while preventing the cookies from spreading too much during baking. If you find your dough too soft, chilling it a bit longer can help achieve that ideal consistency.
During this chilling period, you can clean up your workspace or prepare your baking sheet, maximizing efficiency. If you're short on time, placing the dough in the freezer for 5-10 minutes can yield similar results, but be careful not to freeze it too hard, as that can lead to cracking when rolling it out.
Decorating Tips for Maximum Impact
Once your cookies are fully cooled, decorating is where the magic happens. Aim for a smooth consistency for your icing—this should flow easily but hold its shape. If the icing is too thick, add a teaspoon of milk at a time until you achieve the desired glossiness. Conversely, if it’s too runny, a bit more powdered sugar can adjust the texture appropriately.
Get creative with your decorating! Consider using different shades of green for a more vibrant appearance, or incorporate edible glitter for a festive sparkle. Adding unique sprinkles not only enhances visual appeal but also provides a delightful crunch against the soft cookie. Allow the icing to set completely before stacking or serving; this can take anywhere from 30 minutes to a few hours depending on your icing's thickness.
Ingredients
Ingredients
For the Cookies
- 2 3/4 cups all-purpose flour
- 1 teaspoon baking powder
- 1/2 teaspoon salt
- 1 cup unsalted butter, softened
- 1 1/2 cups granulated sugar
- 1 egg
- 1 teaspoon vanilla extract
- 1/2 teaspoon almond extract
- Green food coloring
For the Icing
- 2 cups powdered sugar
- 2 tablespoons milk
- 1 teaspoon vanilla extract
- Green food coloring
- Sprinkles (optional)
Instructions
Instructions
Prepare the Dough
In a bowl, whisk together the flour, baking powder, and salt. In a separate large bowl, cream the butter and sugar until light and fluffy. Beat in the egg, vanilla extract, and almond extract. Gradually add the dry ingredients to the wet ingredients, mixing just until combined. Add green food coloring until the desired color is achieved, then chill the dough for about 15 minutes.
Shape the Cookies
Preheat the oven to 350°F (175°C). Roll out the chilled dough on a lightly floured surface to about 1/4 inch thick. Use a shamrock-shaped cookie cutter to cut out the cookies and place them on a baking sheet lined with parchment paper. Bake for 8-10 minutes or until the edges are lightly golden.
Make the Icing
While the cookies cool, whisk together the powdered sugar, milk, and vanilla extract in a bowl. Adjust the consistency by adding more milk or powdered sugar as needed. Mix in green food coloring to achieve the desired shade.
Decorate
Once the cookies are completely cool, use the icing to decorate them. Add sprinkles if desired, and let the icing set before serving.
Pro Tips
- For an extra touch, consider adding citrus zest, like lime or lemon, to the dough for a zesty flavor. Keep an eye on the baking time, as thinner cookies will need less time in the oven.
Storage and Make-Ahead Tips
Shamrock Sugar Cookies can be made a few days in advance, making them ideal for festive occasions. Once baked and cooled, store them in an airtight container at room temperature; they should stay fresh for about a week. For longer storage, consider freezing the cookies without icing, which can last for up to three months. Just be sure to wrap them tightly in plastic wrap to prevent freezer burn.
If you're storing decorated cookies, allow the icing to set fully before layering them in your container, with parchment paper between layers as a barrier. This will prevent the beautiful decorations from smudging. When you're ready to enjoy, simply take them out and let them sit at room temperature for about 15 minutes for the best texture.
Troubleshooting Common Issues
If your cookies spread too much during baking, chances are your butter was too soft or you didn’t chill the dough sufficiently. Ensure that your ingredients are measured correctly, particularly the butter; it should be softened but not melted. Always check for the dough's consistency before rolling it out—if it feels too sticky, consider adding a little extra flour.
In case the cookies come out too hard or crunchy, it might be a result of overbaking. Keep a close watch as they bake; they should be removed from the oven when the edges are lightly golden, allowing for a soft center. If you're unsure, test one cookie first before pulling out the entire baking sheet.
Questions About Recipes
→ Can I use margarine instead of butter?
While margarine can be used, using butter will provide a richer flavor and better texture for the cookies.
→ How should I store the cookies?
Store the cookies in an airtight container at room temperature for up to a week.
→ Can I freeze the cookie dough?
Yes, you can freeze the dough for up to 3 months. Just thaw in the refrigerator before rolling out and baking.
→ What can I use if I don’t have cookie cutters?
You can use a knife to cut the dough into different shapes or simply create round cookies using a glass.
Shamrock Sugar Cookies
Created by: The Quickbitehub Team
Recipe Type: Dessert Recipe Collection
Skill Level: Beginner
Final Quantity: 24 cookies
What You'll Need
For the Cookies
- 2 3/4 cups all-purpose flour
- 1 teaspoon baking powder
- 1/2 teaspoon salt
- 1 cup unsalted butter, softened
- 1 1/2 cups granulated sugar
- 1 egg
- 1 teaspoon vanilla extract
- 1/2 teaspoon almond extract
- Green food coloring
For the Icing
- 2 cups powdered sugar
- 2 tablespoons milk
- 1 teaspoon vanilla extract
- Green food coloring
- Sprinkles (optional)
How-To Steps
In a bowl, whisk together the flour, baking powder, and salt. In a separate large bowl, cream the butter and sugar until light and fluffy. Beat in the egg, vanilla extract, and almond extract. Gradually add the dry ingredients to the wet ingredients, mixing just until combined. Add green food coloring until the desired color is achieved, then chill the dough for about 15 minutes.
Preheat the oven to 350°F (175°C). Roll out the chilled dough on a lightly floured surface to about 1/4 inch thick. Use a shamrock-shaped cookie cutter to cut out the cookies and place them on a baking sheet lined with parchment paper. Bake for 8-10 minutes or until the edges are lightly golden.
While the cookies cool, whisk together the powdered sugar, milk, and vanilla extract in a bowl. Adjust the consistency by adding more milk or powdered sugar as needed. Mix in green food coloring to achieve the desired shade.
Once the cookies are completely cool, use the icing to decorate them. Add sprinkles if desired, and let the icing set before serving.
Extra Tips
- For an extra touch, consider adding citrus zest, like lime or lemon, to the dough for a zesty flavor. Keep an eye on the baking time, as thinner cookies will need less time in the oven.
Nutritional Breakdown (Per Serving)
- Calories: 120 kcal
- Total Fat: 7g
- Saturated Fat: 4g
- Cholesterol: 20mg
- Sodium: 45mg
- Total Carbohydrates: 14g
- Dietary Fiber: 0g
- Sugars: 8g
- Protein: 1g